Reversing Runtastic API
Unlike other popular running applications (Strava, Endomondo, Runkeeper), Runtastic doesn’t offer you an option to export all your running data at once. If you want to create a backup of your data or switch to another application, you have to export your activities one by one using the web interface, which is quite a slow process. Because I wanted to have backup of my data, and also automate the backup process, I decided to reverse the API that Runtastic application is using, and to write a nice little program to archive all of my activities.
Intercepting network traffic
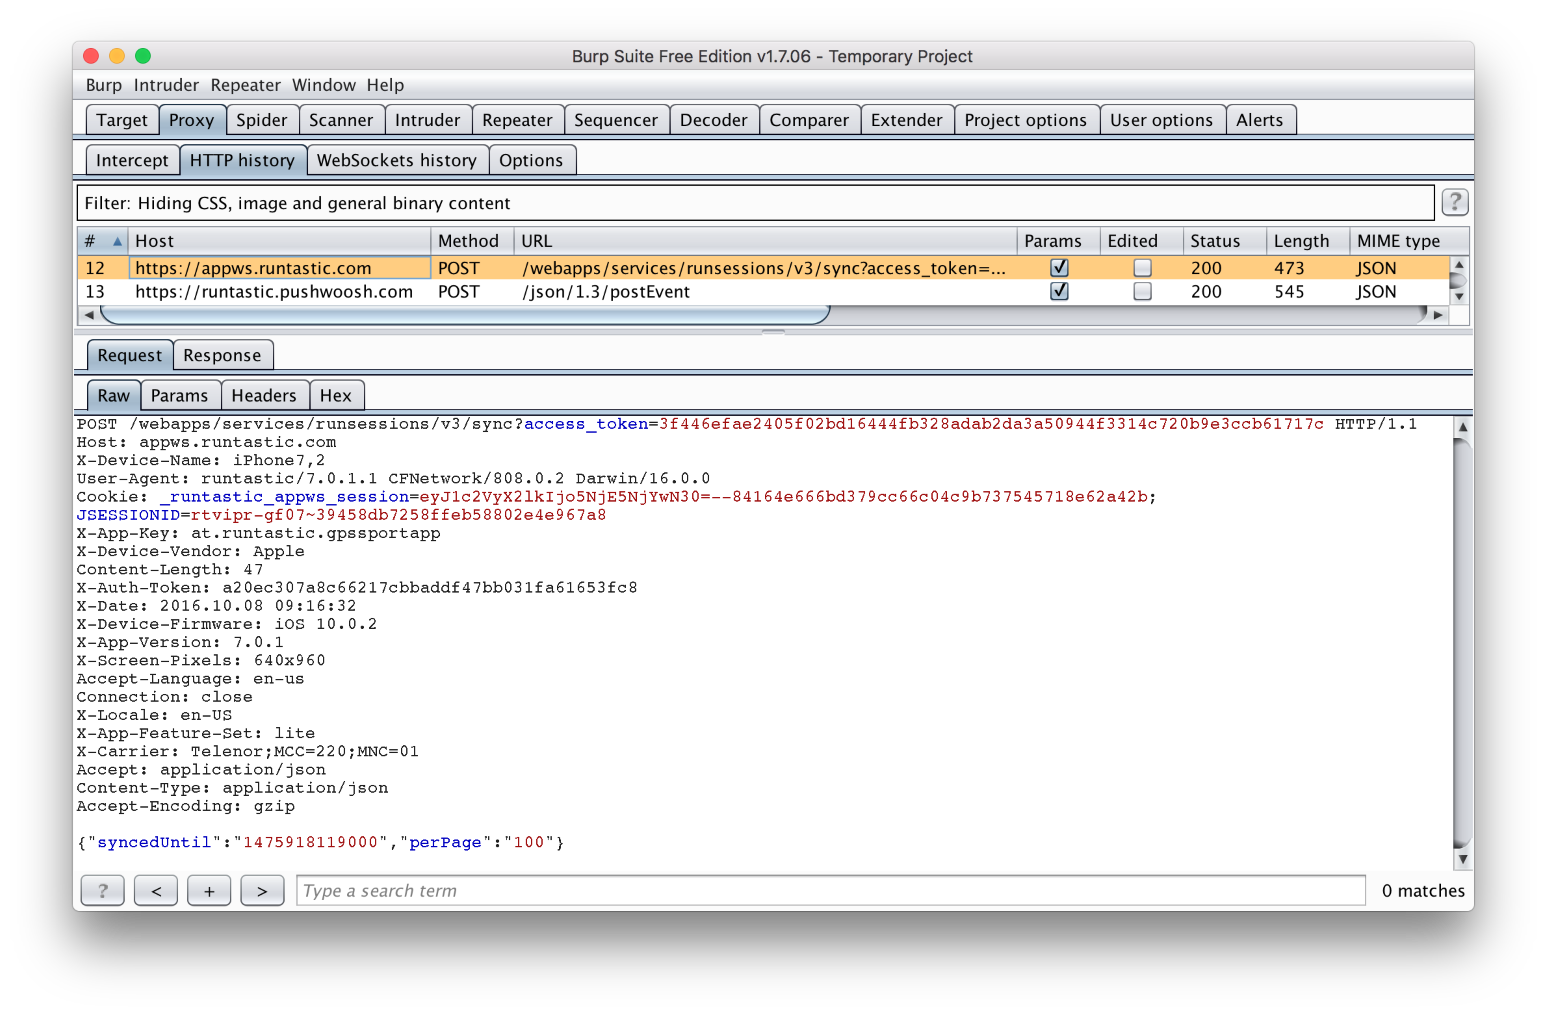
First, let’s see which HTTP requests the application is making. To do such a thing for mobile applications, you have to install HTTP proxy software on your computer, and configure the phone to connect to the computer instead of directly connecting to the internet. I’ve heard a lot of nice things about Burp Suite before, so I decided to give it a try.
After configuring the device to connect to Burp, we can now try to sync the activities. When you swipe the screen to do that, application starts making bunch of HTTP requests, but only two of them are to Runtastic servers. We can see that request number 12 is the one that asks the server for the latest activities. It’s passing the access_token parameter via the query parameter, so that must be the way that the request is authenticated. Let’s back up a little bit and figure out how to obtain it.
Login process
We will log out from the application and monitor outgoing requests to see how the application is logging in. First thing that application does is posting the following JSON data to https://appws.runtastic.com/webapps/services/auth/login:
{
  "email": "imateapot@mailinator.com",
  "additionalAttributes": [
    "accessToken"
  ],
  "password": "imateapot"
}
If the credentials are correct, the server will respond with the user ID and access token that we need:
{
  "userId": "96196607",
  "accessToken": "3f446efae2405f02bd16444fb328adab2da3a50944f33a4c720b9e3ccb61717c",
  "uidt": "133d21f2228e8a0107c1cb003c0fe1897fc8450c"
}
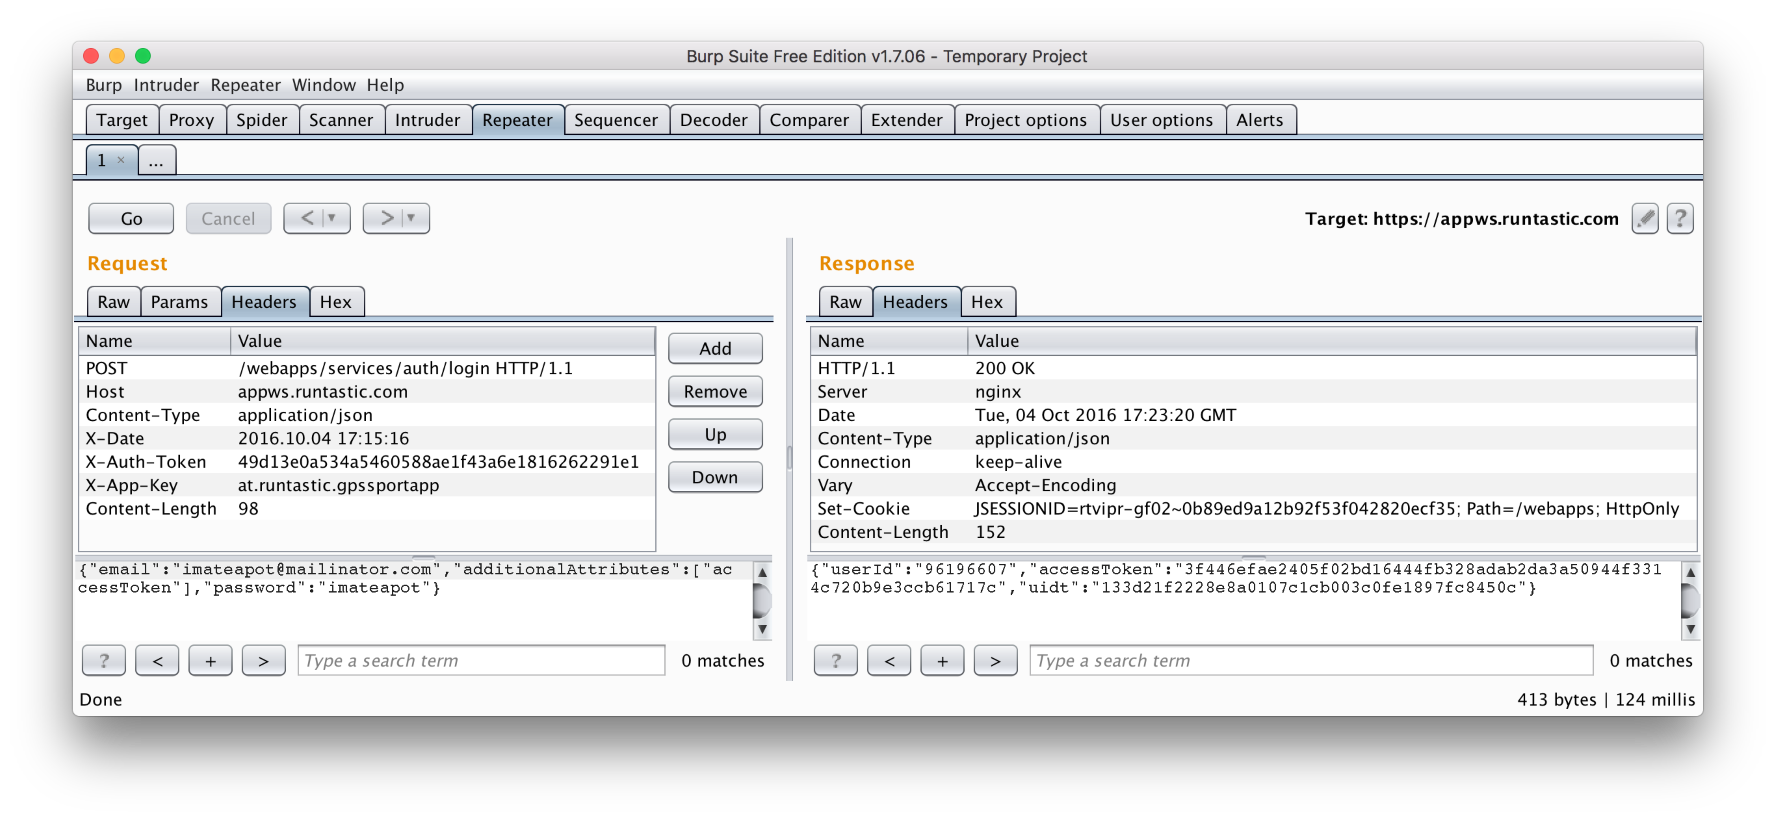
Now we are going to try to replicate the request without using the application, to see if we can repeat the login process. After playing for a few minutes with the Burp Suite, I discovered one really nice feature called Repeater. In the HTTP history tab, you can right-click on any request and send it to Repeater, from which you can resend the request as many times as you want, with all its associated headers and query parameters. You can also play with the request in different ways. You can modify the body of the request and add/remove/modify headers, for example (we can use that to see which request headers were required, and which were optional). After testing every header, I discovered that X-Date, X-Auth-Token and X-App-Key were needed to successfully complete the login.
If we try to change the date or the app key, but use the same auth token, server will reject our request. That probably means auth token calculation is somehow combining at least the date and the app key. App key always stays the same (at.runtastic.gpssportapp for iOS Runtastic application) and we can determine current date at any given moment, so we only have to figure out how to calculate auth key based on those two values. If we take a closer look at auth token, we can see that it contains 40 bytes of hex data, which is 20 bytes of actual data. The usual way of combining multiple values into fixed size output is by using a hash function, and 20 bytes is the output size of SHA1 function. Hash functions can be called directly, or as a part of some MAC construction that takes secret key as an additional parameter. Most widely used MAC is HMAC. Armed with this knowledge, I tried to do a few obvious things, like concatenating the date and the app key and hashing them, calling the HMAC with app key as secret key and date as data to be authenticated, etc. I had no luck in my attempts, which meant I was going to have to reverse the application binary to see how it’s generating the auth token.
Calculating X-Auth-Token
I’m using Runtastic application on iOS, and to reverse the iOS app you need jailbroken device, but that was not an option for me. Since I am most experienced with .NET development, my next step was to try to reverse Runtastic app for the Windows Phone. I hit the wall there too, because all Windows Phone applications are encrypted and the phone is doing the decryption, so there was no way to do that without the actual phone (not sure if it’s easy to do or possible even with the phone). My next attempt was to see if Windows Store on desktop has the Runtastic application, because Windows Store applications are also .NET applications. After searching for Runtastic, I got the following results:
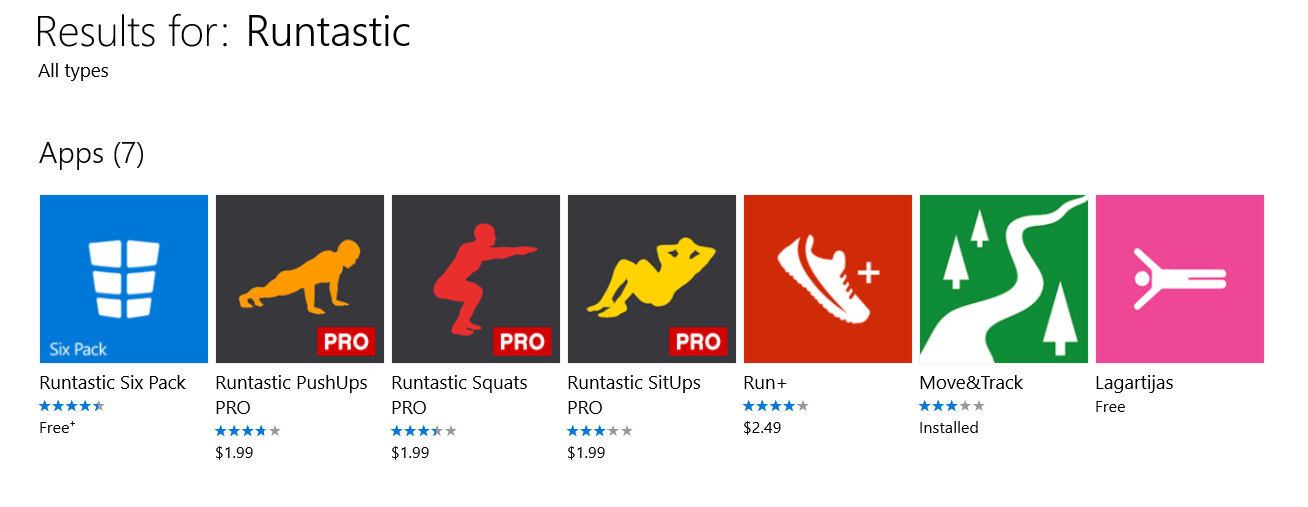
There was no Runtastic running application, but I assumed that all of them are probably using the same authentication process, so I installed Runtastic Six Pack. After that I tried to load it’s main dll (Runtastic.SixPack.WindowsPhone.dll) in dotPeek, which is my favorite .NET decompiler. Unfortunately, dotPeek couldn’t load the dll. What was happening there? It turned out that applications targeting Windows 10 are compiled to native code using .NET native technology, and that was the reason I couldn’t decompile it in dotPeek, because it can only decompile managed applications. Description for the application confirmed that - it’s only available on Windows 10 version 10240.0 or higher. Now I had to find out if any of the remaining Runtastic applications in the list could be decompiled. Runtastic PushUps PRO has Windows 8.1 or higher as a requirement, so I purchased it. This applications had a lot of dlls, but only few of them looked promising. Among them were:
- NetworkModulePCL.dll
- Runtastic.FAC.Common.dll
- Runtastic.FAC.Core.dll
- Runtastic.FAC.Database.dll
I loaded them all into dotPeek and started looking for code that is generating the auth token. I started with the Runtastic.FAC.Common and Runtastic.FAC.Core, but didn’t find anything there. Then I opened NetworkModulePCL, and after few minutes of going through the classes defined in it, I found NetworkTools class in Runtastic.FAC.Network.Util namespace with the following method:
public static string GetAuthorisationToken()
{
  return BitConverter.ToString(new SHA1Managed().ComputeHash(
    Encoding.UTF8.GetBytes(string.Format("--{0}--{1}--{2}--",
      (object) NetworkSettings.Instance.AppKey,
      (object) NetworkSettings.Instance.AppSecret,
      (object) DateTime.UtcNow.ToString("yyyy-MM-dd HH:mm:ss")))
  )).Replace("-", "").ToLower();
}
That’s it! Application was using both date and app key to generate the SHA1 hash, but it’s also using some secret value. All that was left to do was to find the secret value, and it was somewhere in NetworkSettings class. Private constructor for NetworkSettings class looks like this:
switch (GeneralSettings.Instance.AppType)
{
  case AppType.PushUpsW8:
    this.AppKey = "com.runtastic.windows.pushup.pro";
    this.AppSecret = "H55779eb12238015988c9badf27cf5b5f11faff341ea9722b8d178290323477f";
    this.ApplicationName = "com_runtastic_pushups";
    break;
  case AppType.SitUpsW8:
    this.AppKey = "com.runtastic.windows.situp.pro";
    this.AppSecret = "L7164e6f012971b4fba49a297ee1c0487366f548c2723b7576a0f84c3ef4384f";
    this.ApplicationName = "com_runtastic_situps";
    break;
  case AppType.SquatsW8:
    this.AppKey = "com.runtastic.windows.squats.pro";
    this.AppSecret = "Zb237812f511a03cff619ef4bff891289771ee62f76537c46abdd2fe9c606b53";
    this.ApplicationName = "com_runtastic_squats";
    break;
}
At this point I thought I had everything that’s needed to complete the login process and that I could move on to figuring out how to actually download the activities.
Syncing activities, first attempt
I started by trying to retrieve the list of all of my activities from the server, but this time without the Runtastic application. I discovered that in addition to using the access token and setting X-Date, X-App-Key and X-Auth-Token headers, I also had to set the X-App-Version header. After doing that with the values for the PushUps app, server said that I was still unauthorized. That meant server will give me list of running activities only if I log in from the running application. It probably does that by comparing the app key with the list of all known app keys for the running applications. Now I had a problem, because there was no .NET version of running application that I could decompile, which left me with only one more option - to try to decompile Runtastic application for Android.
Decompiling Runtastic app for Android
Because I already knew at this moment how to generate the auth token using app key, app secret and date, this step was not that complicated. I only needed to find app key and app secret for the Android application. After searching Google on how to decompile Android apps, I found Apktool. No Android phone was necessary to extract the application file, because all applications are mirrored on bunch of sites on the internet. I found Runtastic 6.8.1 on the APKMirror. After calling apktool with the application file, I got hundreds of .smali files, which contained the application bytecode. And after running grep for “secret” on all of them, I quickly found the app secret. With that, the sync process was finally working.
Syncing activities, second attempt
Now that we can actually execute the sync request, let’s see what data is server sending to us. Response looks something like this (response is actually a lot bigger, I’m showing only relevant fields here):
{
  "perPage": "100",
  "syncedUntil": "1475918625000",
  "moreItemsAvailable": "false",
  "sessions": [
    {
      "id": "1414523234",
      "gpsTraceAvailable": "true"
    },
    {
      "id": "1414523238",
      "gpsTraceAvailable": "true"
    },
    {
      "id": "1414523236",
      "gpsTraceAvailable": "true"
    }
  ]
}
After retrieving the list of activities, application is making a new request for each one of them to retrieve the GPS data. For the first activity in the list applications makes a POST request to https://appws.runtastic.com/webapps/services/runsessions/v2/1414523234/details?access_token=3f446efae2405f02bd16444fb328adab2da3a50944f3314c720b9e3ccb61717c, and the server responds with JSON data that contains the trace field with the following value:
AAAABgAAAVcPriMIQaPD2EIzPTBDAXwSAAAAAAAAAAAAAAAAAAAAAAAAAAABVw+uJvBBo8PhQjM9
GkMBj/8AAEIHyUEAAAPoAAAACQABAAAAAAFXD64yqEGjw/NCMzz6QwGqZQAAQYTgDwAAD6AAAAAX
AAEAAAAAAVcPrjp4QaPEC0IzPOpDAbnQAABBXWgrAAAXcAAAAB8AAQAAAAABVw+uQkhBo8QtQjM8
2kMBw7IAAEF0xUYAAB9AAAAAJwABAAAAAAFXD65KGEGjxFhCMzzJQwHbggAAQYuCUwAAJxAAAAAx
AAEAAA==
The trace field looks like it’s GPS data for the activity, encoded in some way. At this moment, I could have tried to decode that data, but I thought that there must be and easier way to do what I needed. I knew that in the Runtastic web application there was a way to export each activity to some of the popular formats (gpx and tcx, for example), so instead of decoding the raw data and creating the gpx or tcx file manually, we could somehow determine the export URL, and let the server generate the file for us.
Exporting activity in the web application
If you open an activity in the web application, you can find the options menu there, which contains options to export the data in several formats. If you select the gpx export, your web browser will download the exported file from the following URL:
https://www.runtastic.com/en/users/96196607/sport-sessions/57f8bd3371c40cf4244c467c.gpx
The number 96196607 is the user ID, which we already have from the login response. The string 57f8bd3371c40cf4244c467c looks like some king of activity ID, but it’s not the same as the ID we already have. Is there a way to convert the real ID into the ID needed to export the data? Let’s look at the requests that are being made when we select the activity from the list of all activities. One of them is to the following URL:
https://hubs.runtastic.com/samples/v2/users/96196607/samples/1414541859?include=trace_collection
The server responds with this:
{
  "data": {
    "id": "57f8bd3371c40cf4244c467c",
    "type": "run_session"
  }
}
That is exactly what we need! The ID in the response is the same as the gpx file name. Now we have a way to export the activity using only the original ID. Only thing left to do is to figure out how to authenticate the request.
Web application login
This part was pretty straightforward. If you follow the network traffic after clicking the login button, you will see the POST request to the https://www.runtastic.com/en/d/users/sign_in, with the following form data:
user[email]:imateapot@mailinator.com
user[password]:imateapot
authenticity_token:NTEttM7LEVDRFmVKlyb6PQeaNFixCfp5738vaZTm0ao=
grant_type:password
In the response, server will give us cookie called _runtastic_session, that we will attach to every request as an authentication.
Summary
At this moment I had everything I need to automate the backup process. The steps look roughly like this:
- Log into application API server
- Download list of all activities
- Log into web application
- Find the export URL for each activity
- Download all the files and zip them
Complete program written in Go can be found here.